
cooks shank portion ham cooking instructions
Understanding Ham (Shank Portion) and Cooking Instructions
Ham shank portions, popular among radio enthusiasts (HAM radio) and cooks alike, require specific preparation and cooking techniques for optimal flavor․
Understanding these nuances ensures a delicious, tender result, whether slow-cooked or baked․
What is a Ham Shank Portion?
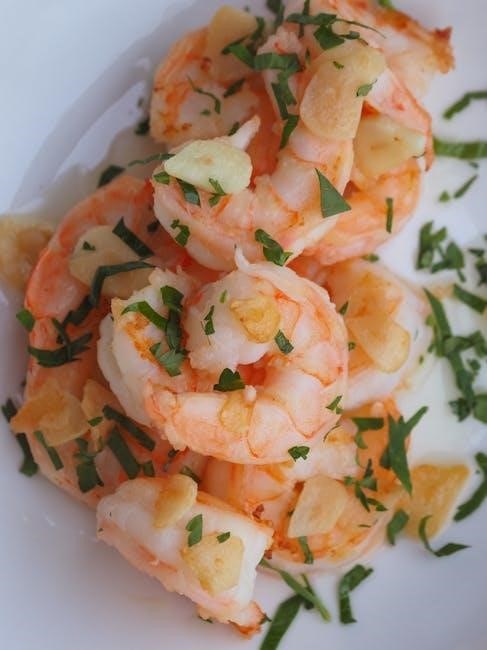
A ham shank is the lower portion of the pig’s leg, after it’s been cured and smoked to become ham․ It’s a tougher cut than the ham hock, possessing a significant bone and a generous amount of connective tissue․ This makes it ideal for long, slow cooking methods, as these break down the collagen, resulting in incredibly tender and flavorful meat․
Unlike leaner cuts, the shank boasts a rich, robust flavor due to the fat content and the curing process․ It’s often more affordable than other ham cuts, making it a budget-friendly option for hearty meals․ While it requires patience to cook properly, the payoff is a deeply satisfying and flavorful experience, perfect for soups, stews, or as a centerpiece․
Identifying Quality Ham Shanks
When selecting a ham shank, look for a piece with a good meat-to-bone ratio․ The meat should have a vibrant pinkish-red color, indicating proper curing․ Avoid shanks that appear pale or grayish, as this could suggest age or improper storage․ A slight sheen on the surface is a good sign of freshness․
The shank should feel firm to the touch, not mushy or slimy․ A good quality shank will also have a noticeable smoky aroma․ Inspect the bone end; it shouldn’t be cracked or splintered․ Consider the size – a larger shank will yield more meat, but also require a longer cooking time․ Ultimately, choosing a shank from a reputable butcher or supplier ensures a superior product․
Different Types of Ham Shanks
Ham shanks vary based on the pig’s leg section and curing process․ Front shanks generally have more connective tissue, benefiting from longer, slower cooking to become tender․ Rear shanks are leaner with a more pronounced ham flavor, suitable for quicker methods․
Smoked ham shanks impart a robust smoky taste, ideal for soups and stews․ Unsmoked shanks offer a milder flavor, allowing seasonings to shine․ City hams are wet-cured and often contain added flavors, while country hams are dry-cured and saltier․ Prosciutto shanks, though expensive, provide intense flavor․ Selecting the right shank depends on your desired flavor profile and cooking method․
Preparing the Ham Shank for Cooking
Proper preparation is key! Rinsing removes excess salt, scoring allows flavor penetration, and brining/marinating enhances the ham shank’s overall deliciousness․
Rinsing and Patting Dry
Before any cooking begins, thoroughly rinse the ham shank under cold running water․ This crucial step removes a significant portion of the salt used during the curing process, preventing an overly salty final dish․ Many commercially available ham shanks are quite salty, and this rinsing is essential for balancing the flavor․
After rinsing, use clean paper towels to thoroughly pat the ham shank dry․ Removing excess moisture allows for better searing if you choose to do so, and promotes a more even cooking process․ A dry surface also helps any glazes or marinades adhere properly, maximizing flavor absorption․ Don’t skip this step – a dry shank equals better results!
Scoring the Ham (Optional)
Scoring the ham shank is a technique that isn’t strictly necessary, but can enhance flavor penetration and presentation․ Using a sharp knife, carefully make shallow, diamond-shaped cuts across the surface of the ham․ These cuts should be about ½ inch deep and spaced roughly an inch apart․
This scoring creates more surface area for glazes or marinades to seep into the meat, intensifying the flavor․ It also allows some of the rendered fat to escape during cooking, resulting in a slightly leaner texture․ Visually, scoring adds an attractive element to the finished dish․ However, be cautious not to cut too deeply, as this can cause the ham to dry out during the cooking process․
Brining or Marinating (Enhancing Flavor)
Brining or marinating a ham shank, though often skipped, significantly elevates its flavor profile․ Brining involves submerging the shank in a saltwater solution, often with added sugar and spices, for 12-24 hours․ This process allows the meat to absorb moisture and seasoning, resulting in a juicier, more flavorful final product․
Marinating, conversely, uses an acidic base (like vinegar or citrus juice) combined with herbs and spices․ While shorter in duration (4-8 hours), marinating tenderizes the meat and imparts distinct flavors․ Consider using brown sugar, maple syrup, or fruit juices in your brine or marinade to complement the ham’s natural saltiness․ Both methods are excellent ways to customize the taste․
Cooking Methods for Ham Shanks
Ham shanks benefit from low and slow cooking, yielding tender results․ Options include slow cooking, oven baking, and pressure cooking – each offering unique advantages for flavor and time․
Slow Cooking: The Preferred Method
Slow cooking truly excels with ham shanks, transforming this tougher cut into a remarkably tender and flavorful experience․ The extended, gentle heat breaks down connective tissues, resulting in fall-off-the-bone goodness․ This method is incredibly forgiving, allowing for long cooking times without compromising quality․
Unlike quicker methods, slow cooking allows the ham shank to fully absorb the flavors of any accompanying liquids or seasonings․ It’s ideal for creating rich, savory sauces and deeply infused tastes․ Consider adding aromatic vegetables like onions, carrots, and celery, alongside herbs and spices, to build a complex flavor profile․ The low temperature also minimizes the risk of drying out the ham, ensuring a moist and succulent final product․ It’s a hands-off approach, perfect for busy cooks!
Baking in the Oven
Oven baking provides a convenient alternative to slow cooking for preparing a ham shank, offering a balance between speed and flavor development․ While not quite as tenderizing as slow cooking, a properly baked ham shank can still be incredibly delicious․ The key is maintaining sufficient moisture throughout the cooking process․
Begin by placing the ham shank in a roasting pan with a liquid base – broth, apple cider, or even water will work․ Covering the pan initially helps retain moisture, then uncovering it during the final stages allows for some caramelization․ Glazes, applied during the last 30-60 minutes, add sweetness and visual appeal․ Regularly basting the ham with pan juices further enhances flavor and prevents drying․ Monitor internal temperature closely for optimal results․

Pressure Cooking for Speed
Pressure cooking dramatically reduces the cooking time for a ham shank, making it ideal for weeknight meals or when time is limited․ While it doesn’t replicate the extended, low-and-slow tenderness of slow cooking, a pressure cooker still delivers a flavorful and reasonably tender result․ It’s a fantastic option when planning isn’t possible․
Ensure sufficient liquid is added to the pressure cooker – typically 1-2 cups of broth or water – to generate the necessary steam․ Cooking times vary depending on the pressure cooker and shank size, but generally range from 45-75 minutes at high pressure, followed by a natural pressure release․ A quick release can make the ham tougher․ Always prioritize safety when using a pressure cooker and follow manufacturer instructions carefully․
Detailed Cooking Instructions ー Slow Cooker
Slow cooking a ham shank yields incredibly tender results․ This method requires patience, but the low, consistent heat breaks down tough tissues, creating a flavorful, fall-off-the-bone experience․
Slow Cooker Preparation
Begin by ensuring your slow cooker is clean and ready for use․ A 6-quart or larger slow cooker is generally recommended for accommodating a ham shank comfortably․ No pre-browning is typically needed, simplifying the process․ Place the ham shank directly into the slow cooker․
Next, consider aromatics to enhance the flavor profile․ Roughly chop one large onion and two carrots, then scatter them around the ham shank․ Add 2-3 cloves of minced garlic for an extra layer of savory goodness․ These vegetables will infuse the cooking liquid with their flavors, contributing to the overall richness of the dish․
Finally, the choice of liquid is crucial․ Options include chicken broth, apple cider, or even water․ The liquid should cover approximately two-thirds of the ham shank to ensure even cooking and prevent it from drying out․ Avoid fully submerging it, as this can dilute the flavor․
Cooking Time and Temperature
For optimal tenderness, slow cook the ham shank on a low setting for 6-8 hours․ This extended cooking time allows the collagen in the shank to break down, resulting in incredibly moist and flavorful meat․ Alternatively, you can cook it on high for 3-4 hours, but the low and slow method is generally preferred for superior results․
Maintaining a consistent temperature is key․ Avoid lifting the lid frequently during cooking, as this releases heat and extends the cooking time․ The slow cooker should maintain a temperature between 170-200°F (77-93°C) on the low setting․
Regularly check the liquid level during the last few hours of cooking, adding more broth or water if needed to prevent the shank from drying out․ A slightly simmering liquid is ideal for maintaining moisture and flavor․
Liquid Choices for Slow Cooking
Selecting the right liquid significantly impacts the final flavor profile of your ham shank․ Chicken or beef broth provides a savory base, enhancing the natural ham flavor․ Apple cider or juice introduces a subtle sweetness that complements the saltiness of the ham beautifully․
For a deeper, more complex flavor, consider using a combination of liquids – for example, half broth and half apple cider․ Adding a splash of dark beer or wine can also contribute to richness․ Ensure the liquid level reaches about halfway up the shank, providing ample moisture during the long cooking process․
Avoid using water alone, as it lacks the flavor-enhancing properties of broth or cider․ A flavorful liquid ensures the ham remains moist and develops a delicious, tender texture․
Detailed Cooking Instructions ー Oven Baking
Oven baking offers a convenient method for cooking ham shanks, yielding a beautifully browned exterior and tender interior․ Consistent heat distribution ensures even cooking․
Oven Temperature and Baking Time
Preheating your oven to 325°F (160°C) is crucial for consistent cooking․ Place the ham shank, uncovered, on a roasting rack within a baking pan․ This elevates the shank, allowing for even heat circulation․
Baking time depends on the shank’s weight; a general guideline is 15-20 minutes per pound․ For a typical 3-5 pound shank, expect a baking duration of approximately 45 minutes to 1 hour and 40 minutes;
Regular basting with pan juices or a glaze (discussed later) every 20-30 minutes will maintain moisture and enhance flavor․ Using an oven thermometer ensures accurate temperature control, vital for preventing dryness․ Remember to check internal temperature for doneness!
Glazing Options for Oven-Baked Ham
Glazing elevates the flavor profile of your oven-baked ham shank․ A classic brown sugar glaze, combining brown sugar, Dijon mustard, and a touch of pineapple juice, offers a sweet and savory balance․ Alternatively, a maple-bourbon glaze provides a richer, more complex taste․
For a fruitier glaze, consider apricot preserves thinned with orange juice and a dash of cinnamon․ Apply the glaze during the last 30-45 minutes of baking, basting every 10-15 minutes to build a beautiful, caramelized crust․
Experimentation is key! Honey-garlic, cherry-chipotle, or even a simple maple syrup glaze can transform your ham shank․ Ensure the glaze doesn’t burn by monitoring closely and adjusting oven temperature if needed․
Checking for Doneness
Determining doneness is crucial for a perfectly cooked ham shank․ While pre-cooked, it needs reheating to a safe internal temperature․ Use a meat thermometer inserted into the thickest part of the shank, avoiding the bone․
The USDA recommends reheating ham to an internal temperature of 140°F (60°C)․ This ensures any potential bacteria are eliminated, providing a safe and enjoyable meal․ Check the temperature in multiple spots to guarantee even heating․
Beyond temperature, look for a slightly caramelized glaze and juices that run clear when pierced with a fork․ A properly cooked ham shank will be tender and easily pull away from the bone, offering a delightful eating experience․
Serving and Enjoying Your Ham Shank
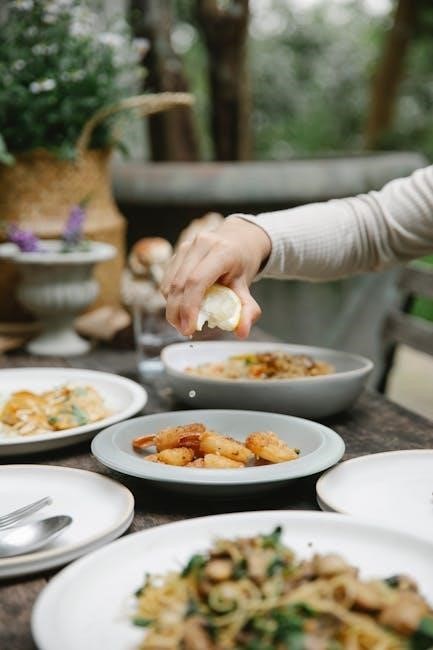
A beautifully cooked ham shank deserves delightful accompaniments! Consider classic sides like scalloped potatoes, roasted vegetables, or a vibrant green bean casserole for a complete meal․
Recommended Side Dishes
Complementing the rich, savory flavor of a ham shank requires thoughtful side dish selections․ Creamy scalloped potatoes provide a comforting and classic pairing, absorbing the delicious pan juices․ Roasted root vegetables, such as carrots, parsnips, and sweet potatoes, offer a touch of sweetness and earthy balance․
For a brighter contrast, consider a vibrant green bean casserole or a crisp coleslaw; Macaroni and cheese, a family favorite, also works wonderfully․ Don’t forget the sauces! A tangy mustard, a sweet fruit chutney, or a simple horseradish cream can elevate the experience․ Finally, crusty bread is essential for soaking up every last bit of flavor․
Carving the Ham Shank
Carving a ham shank differs from a traditional ham due to the bone and muscle structure․ Begin by locating the natural seams between the muscles․ Using a sharp carving knife, slice against the grain, creating thin, even portions․ The shank’s shape means you’ll be working around the bone, so take your time․
Don’t attempt to remove all the meat from the bone at once; instead, carve slices as needed․ The meat closest to the bone is often the most flavorful, so be thorough․ Consider offering both sliced ham and portions still attached to the bone for a rustic presentation․ Remember to save the bone for making flavorful stocks and soups!
Leftover Ham Shank Ideas
Leftover ham shank is incredibly versatile! Shredded ham makes fantastic additions to soups, stews, and hearty casseroles․ Dice it into omelets or frittatas for a protein-packed breakfast․ Consider creating ham and bean soup, utilizing the leftover bone for a rich, smoky broth․
Ham shank also excels in sandwiches, sliders, or even as a topping for pizza․ For a Cuban-inspired dish, layer it with roasted pork and Swiss cheese․ Don’t discard any remaining meat clinging to the bone – it’s perfect for ham salad or adding depth to pasta sauces․ Get creative and enjoy!
Safety Considerations
Proper cooking and storage are vital․ Ensure the ham shank reaches a safe internal temperature to prevent foodborne illness, and refrigerate leftovers promptly for safety․
Internal Temperature Guidelines
Ensuring the ham shank reaches a safe internal temperature is paramount for preventing foodborne illnesses․ The USDA recommends cooking ham to a minimum internal temperature of 145°F (63°C), measured with a food thermometer inserted into the thickest part of the shank, avoiding the bone․
However, many cooks prefer a slightly higher temperature, around 160°F (71°C), for optimal tenderness and flavor development, especially with larger shank portions․ It’s crucial to allow the ham to rest for a minimum of three minutes after removing it from the heat source before carving․ This allows the temperature to equalize and the juices to redistribute, resulting in a more succulent and flavorful final product․ Always verify the temperature in multiple spots to guarantee thorough cooking․
Proper Ham Storage
Storing ham shank correctly is vital for both safety and maintaining quality․ Uncooked ham shanks should be refrigerated immediately and used within 3-5 days, or frozen for longer storage – up to several months․ Ensure the ham is tightly wrapped in plastic wrap, then placed in a freezer-safe bag to prevent freezer burn․
Cooked ham shank leftovers should be refrigerated within two hours of cooking and consumed within 3-4 days․ Proper storage involves placing the ham in an airtight container to prevent drying and absorption of odors․ Always check for any signs of spoilage, such as an off-odor or slimy texture, before consuming․ Safe handling practices are essential for a delicious and worry-free experience․